Summary
Create an image from a Tweet with a Switchboard Canvas template.
Jump To
Share
Create an image from a Tweet with a Switchboard Canvas template.
Jump To
This article is a step by step guide on how to create an image from a tweet.
Firstly, create a new template in Canvas. Select your desired template dimensions from the panel on the left-hand side.
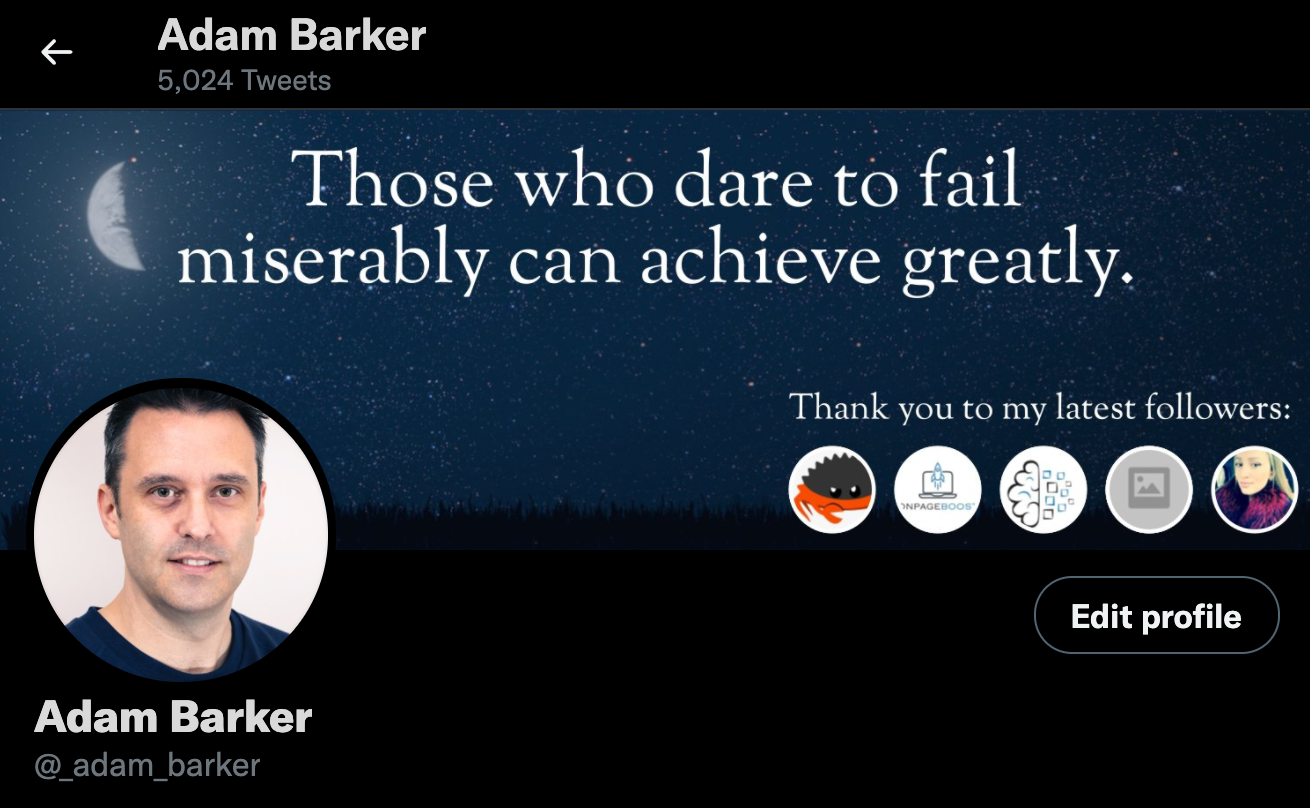
This is, of course, a placeholder image; your author’s profile image will be generated once you call the API. Select ‘Image’ from the toolbar at the top of your template and select an image.

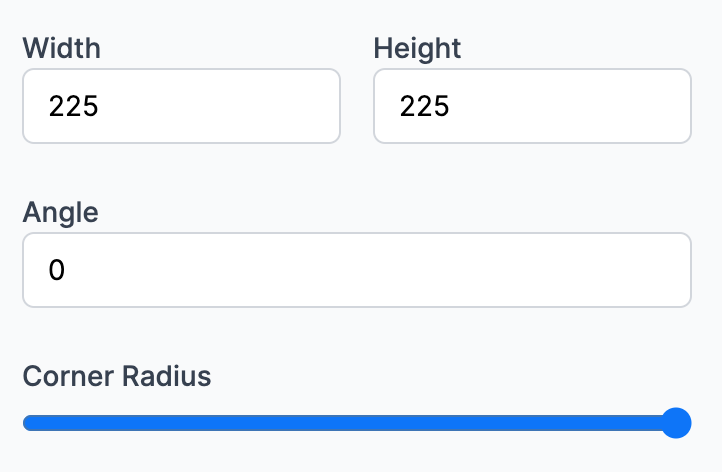
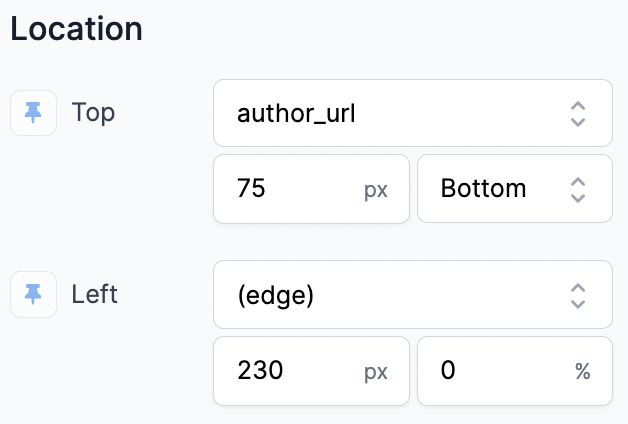
Once you have selected an image, you can use the side panel on the right to increase the corner radius and alter the height and width to make your image circular. Also, place the image where you feel appropriate for your design; this can be done manually by dragging the image with your cursor or using the panel on the right-hand side to pin your image from the relevant edges.
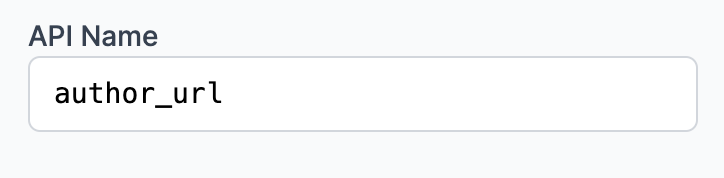
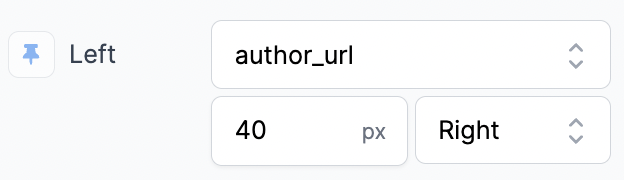
Crucially you need to rename the elements API name; this is so the data can be overwritten with the tweets data when the API is called. For the author’s picture, the API Name must be author_url
The author’s name is the name which appears on their Twitter account. Select ‘text’ from the toolbar at the top of your template to add this.
Resize your text element manually by dragging the corners of the text or by using the right-hand side panel.
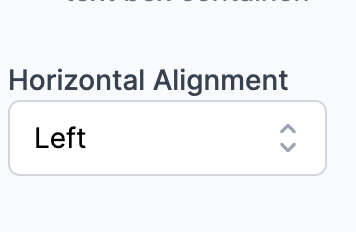
Ensure you have selected ‘left’ under Horizontal Alignment. This will allow your text to start from the edge of the text box with each line.
Position your text where you feel appropriate. Alternatively, you can pin this element to the right side of your author’s picture. Under ‘Location’ on the side panel, select ‘(edge)’ next to the ‘left’. In the dropdown, select ‘author_url’ _. Once selected, select ‘right’ from the drop-down panel below, as you want to pin the author’s name to the right-hand side of the author’s image.

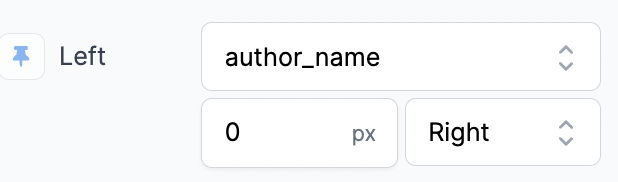
Crucially you need to rename the elements API name; this is so the data can be overwritten with the tweets data when the API is called. For the author’s name, the API Name must be author_name
The author’s username is the account name of their Twitter account. Once again, you will need to select ‘text’ from the toolbar at the top of your template.
Resize your text element manually by dragging the corners of the text or by using the right-hand side panel.
Ensure you have selected ‘left’ under Horizontal Alignment. This will allow your text to start from the edge of the text box with each line.
Position your element below the text of the author’s name, and you can position the author’s username where you feel appropriate. Alternatively, you can pin this element to the right side of your author’s picture. Under ‘Location’ on the side panel, select ‘(edge)’ next to the ‘left’. In the dropdown, select ‘author_url’ _. Once selected, select ‘right’ from the drop-down panel below, as you want to pin the author’s username to the right-hand side of the author’s image.

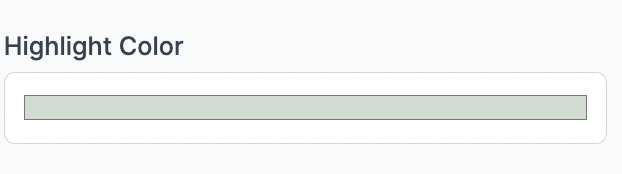
You can also adjust the highlight color for the username element to represent better the tweet from which you want to create an image. To do this, locate the ‘Highlight Color’ on the right-side panel and select your desired colour.
Crucially you need to rename the elements API name; this is so the data can be overwritten with the tweets data when the API is called. For the author’s username, the API Name must be author_username
The verified icon appears next to Twitter accounts which have a considerable amount of followers and if they are famous. The verified icon can be added to your template. If the tweet you want to create an image from is from a verified account, the API will automatically show the verified icon; if the tweet is from an account that is not verified, then the API will not show the icon in the resulting image.
To add the verified icon, download an image of the verified icon from the internet and add it to your library in Switchboard. Select ‘Image’ in the toolbar and select your verified icon.
In the side panel, ensure you have selected to contain your image in the bounding box. You can then resize your image accordingly.

Pin this element to the right-hand side of your author’s name.
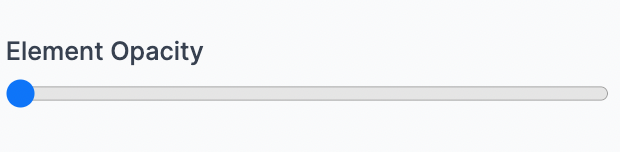
Reduce the element opacity down to 0. As previously mentioned, if the account of the tweet you want to create an image from is verified, the API will increase the element opacity to 1. If the account is not verified, the element opacity will stay at 0.
Crucially you need to rename the elements API name; this is so the data can be overwritten with the tweets data when the API is called. For the verified icon, the API Name must be verified
The text refers to the tweet’s main contents.
Select ‘text’ from the toolbar.
Ensure you have selected ‘left’ under Horizontal Alignment. This will allow your text to start from the edge of the text box with each line.
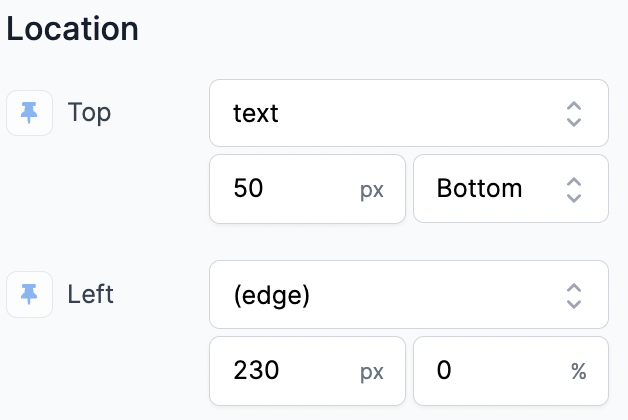
The text element can be pinned to the bottom of the picture and the left of the template.
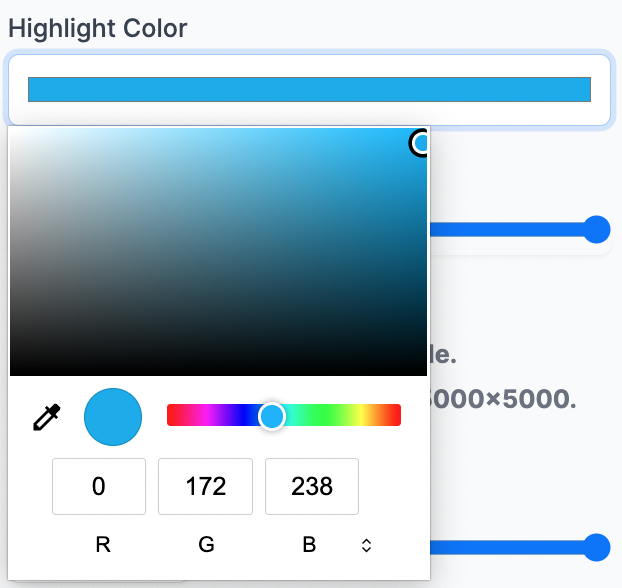
As the tweet may feature a hashtag, which ultimately changes the color of the hashtagged words, you will need to change your highlight color for the text. In the side panel on the right-hand side, select ‘highlight color’, and for the correct shade of blue, add the following to the pallet -
Crucially you need to rename the elements API name; this is so the data can be overwritten with the tweets data when the API is called. For the tweet text, the API Name must be text
The date and time element show when the tweet was published.
This element is a text element, so select Text from the toolbar at the top of the template.
Pin the element to the bottom of the tweet text and resize it accordingly.
Ensure you have selected left under Horizontal Alignment. This will allow your text to start from the edge of the text box with each line.
Crucially you need to rename the elements API name; this is so the data can be overwritten with the tweets data when the API is called. For the time and date, the API Name must be created_at
Now your template is created, make sure you SAVE, and then you can head over to your REST client, such as Insomnia or Postman.
Ensure your API Key is added as the X-API-Key header and matches with your Switchboard Canvas account.
You can view your API key in your templates folder in Switchboard Canvas.
Add the following -
{
    "template": "<your tweet template>",
    "sizes": [
        {
            "width": 1920,
            "height": 1080
        }
    ],
    "tweet": "<tweet URL>"
}
Replace template with the API name of the template you have just created with Switchboard Canvas.
Specify the width and height you want your image to be created.
Replace tweet with the URL of the tweet from which you want to create the image. Alternatively, you can use the tweet’s ID.


We care about the protection of your data.