Summary
Add a button to Airtable that automatically creates images from data in your table in multiple sizes.
Jump To
Share
Add a button to Airtable that automatically creates images from data in your table in multiple sizes.
Jump To
In this tutorial we’re going to connect Airtable to Switchboard Canvas so that you can generate images from data in your tables without ever leaving the site. Airtable becomes your one-click quote maker!
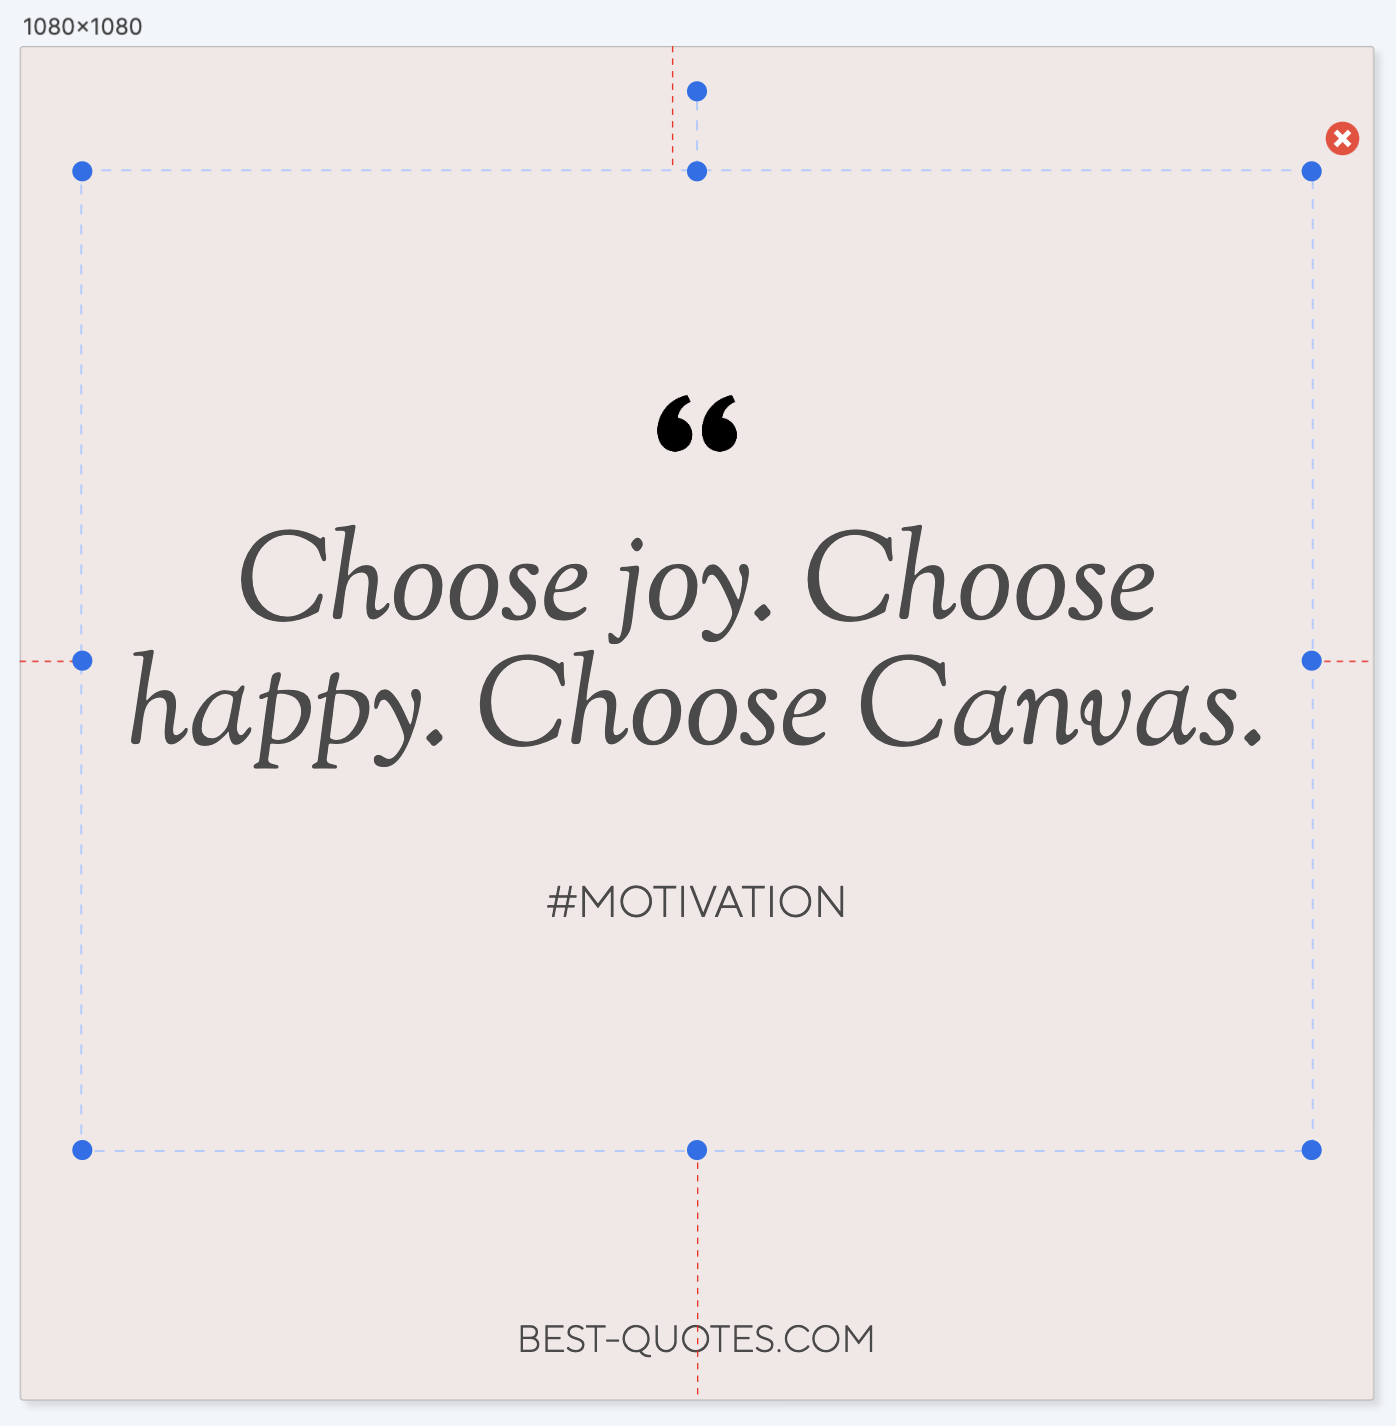
Firstly though, we need to design a template in Canvas, and I’ve put together a commonly-found quote image to use as an example.
The template is called quote-image and it has two elements that we’ll replace with data from Airtable - the quote text itself and the hashtag that appears underneath the quote text. There’s a website URL at the bottom of the image but this can stay with the value we give it in the template, i.e. the fictitious best-quotes.com.
The fourth element in the template is an image a quote symbol to add a little decoration to the design. All elements in Canvas have properties that you can override and change with the API (or with data from other tools like Airtable or Zapier).
I made sure we named the elements something obvious too, as these names will be important when we’re created fields in Airtable:
quotehashtagIn both cases we’ll be overriding the text property.
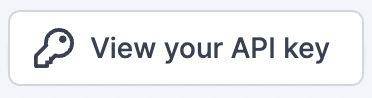
Once the quote template has been created, we only need one other thing, and that’s your API key. On the Canvas homepage, click View your API key in the top right corner and copy the value that’s shown.
This key links requests to Canvas with your account.
Over in Airtable we can make a new table in a base. The magic that powers this process is a script that we’ll need to add but we’ll get to that in a second. First we need to add some fields to the default view in our new table.
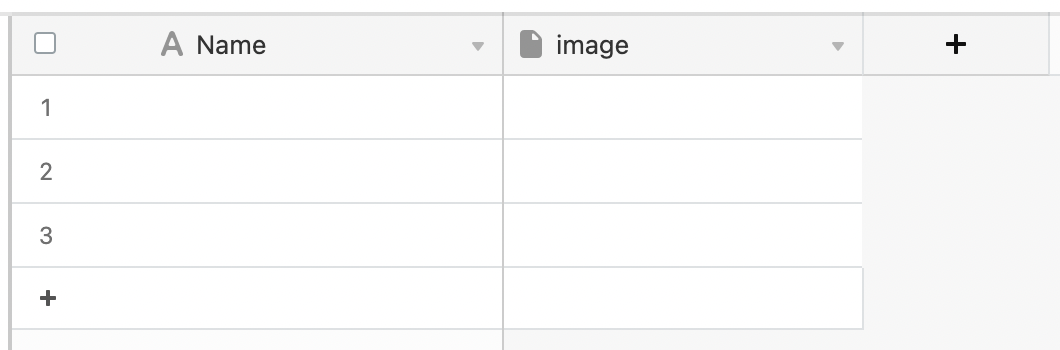
By default a new table looks like this for me:

First I want to remove the Notes and the Status fields, and rename the Attachments field image:
Now we’re going to rename the Name field quote:text.
This naming convention is important because it’s targeting the element and the element’s property in our Canvas template that we want to override.
quote is the quote’s main Text element, and text is the property that we’re overriding with data from our table. We specify this as a field name in our table, separated by a colon.

Next we’ll add another Single Line Text field to our view, and this time we’ll call it hashtag:text. This will be the hashtag that appears under the main quote, i.e. “#MOTIVATION”.
The next field we’ll add is a Multiple Select field called size. We can add some standard image resolutions into the list:
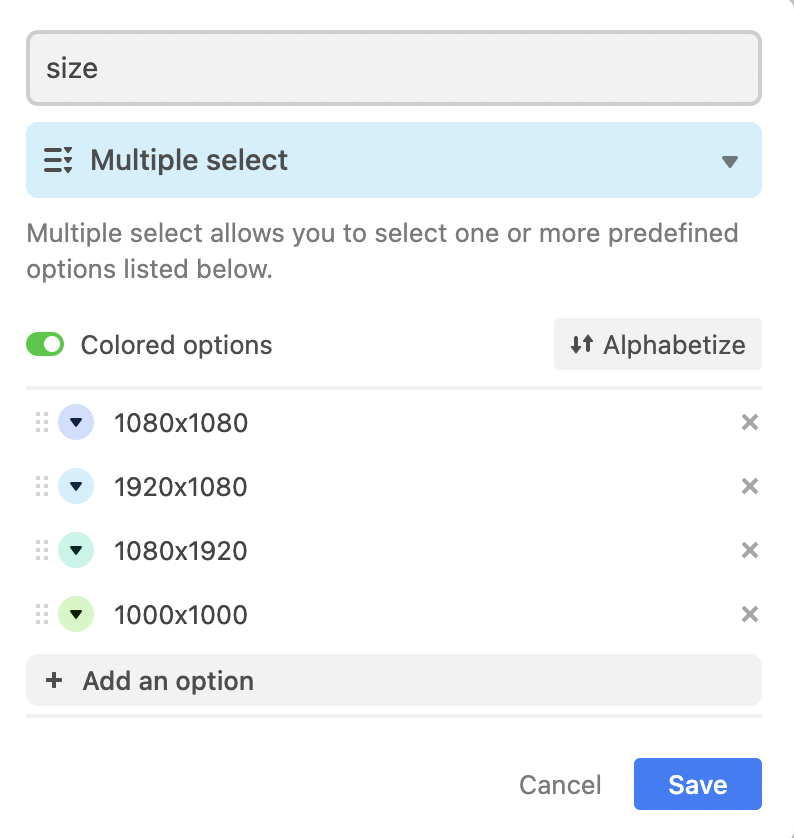
We’ll be able to select one or more sizes from this list and Canvas will create a quote image in each size.
Next we want to add a field that actually contains the name of the template in Canvas that we want to use. In this tutorial we only have one template, but this table could be used to target many different quote templates.
Add a Single Line Text field and call it template.
Next we’ll add a field that stores our API key. Add a Single Line Text field called API Key . In the default text box, paste in the API key from Switchboard Canvas: 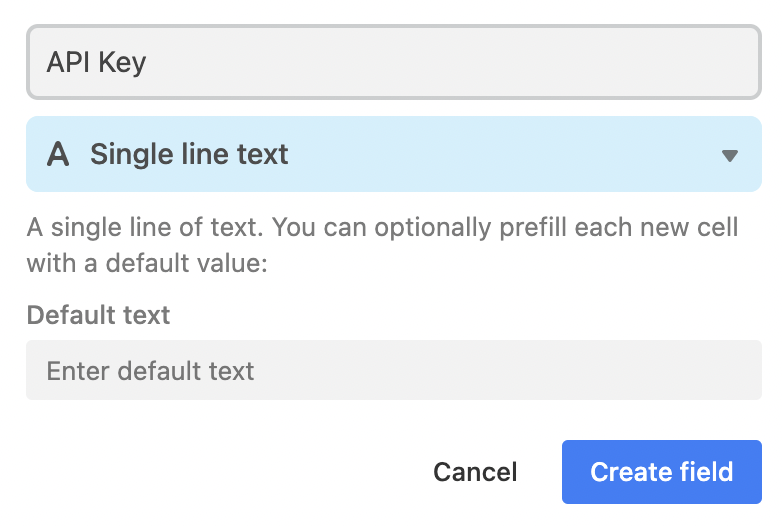
Each new row (quote) you add to your table will now pick up your API key automatically, so you don’t need to worry about this or even see it again. You can hide this field to clean up the view a little: 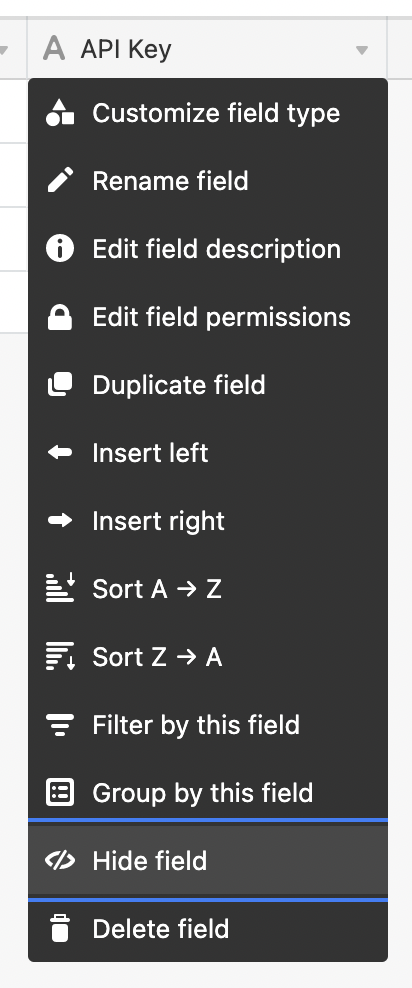
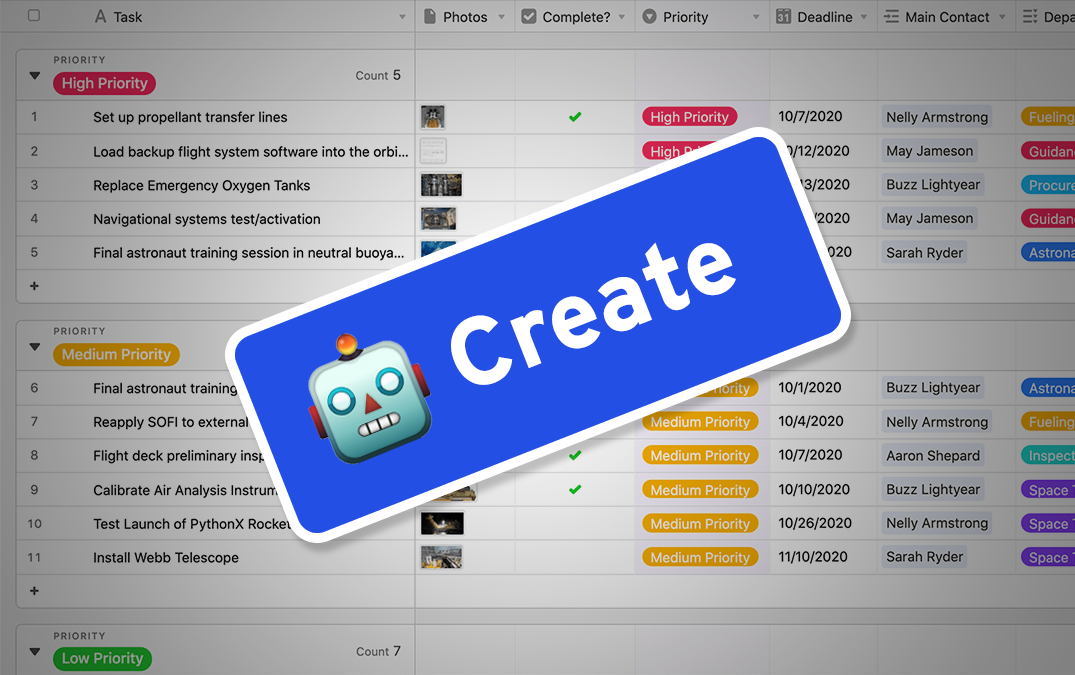
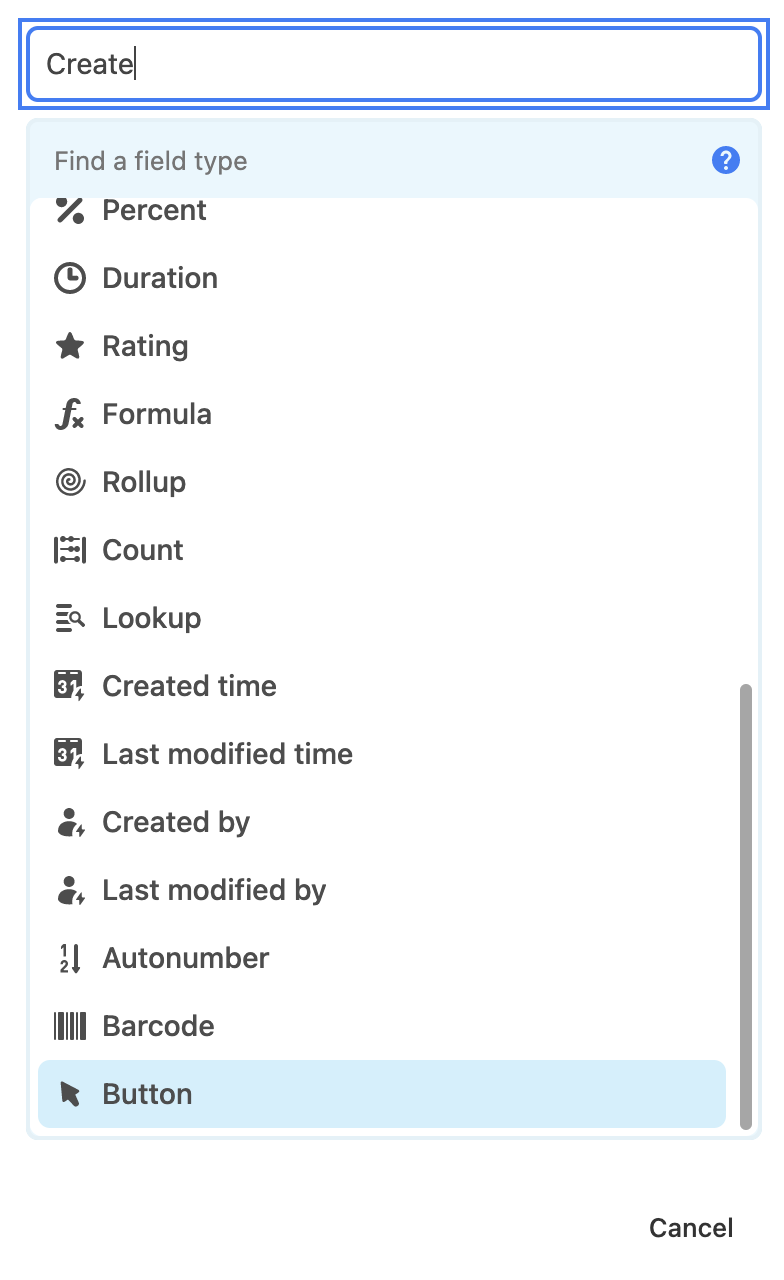
Lastly we’re going to add a field of type Button called Create:
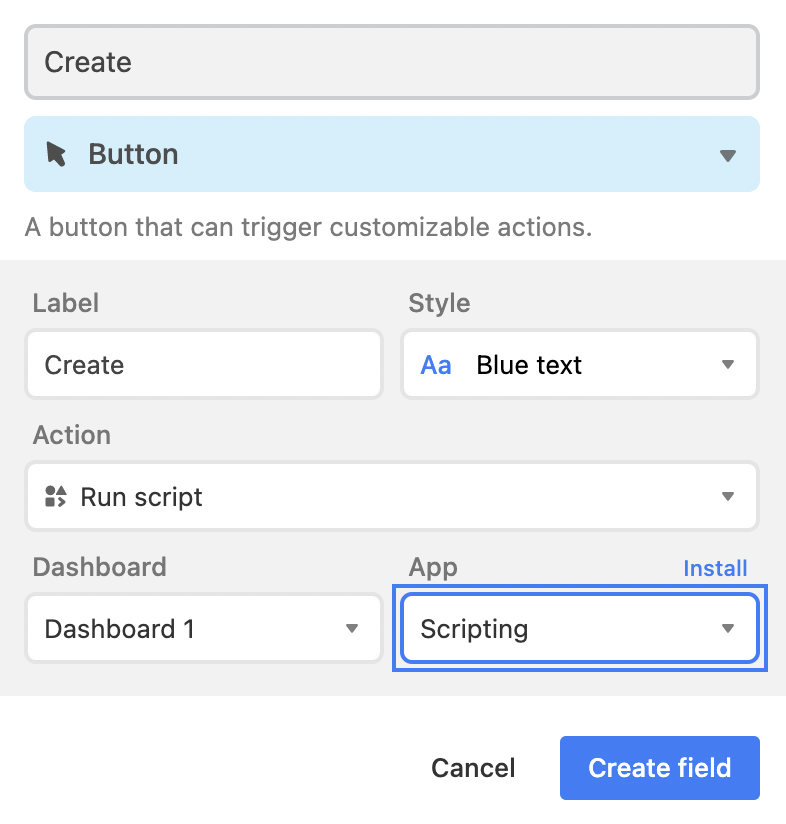
On the right hand side you should see the Apps pane open showing Dashboard1: 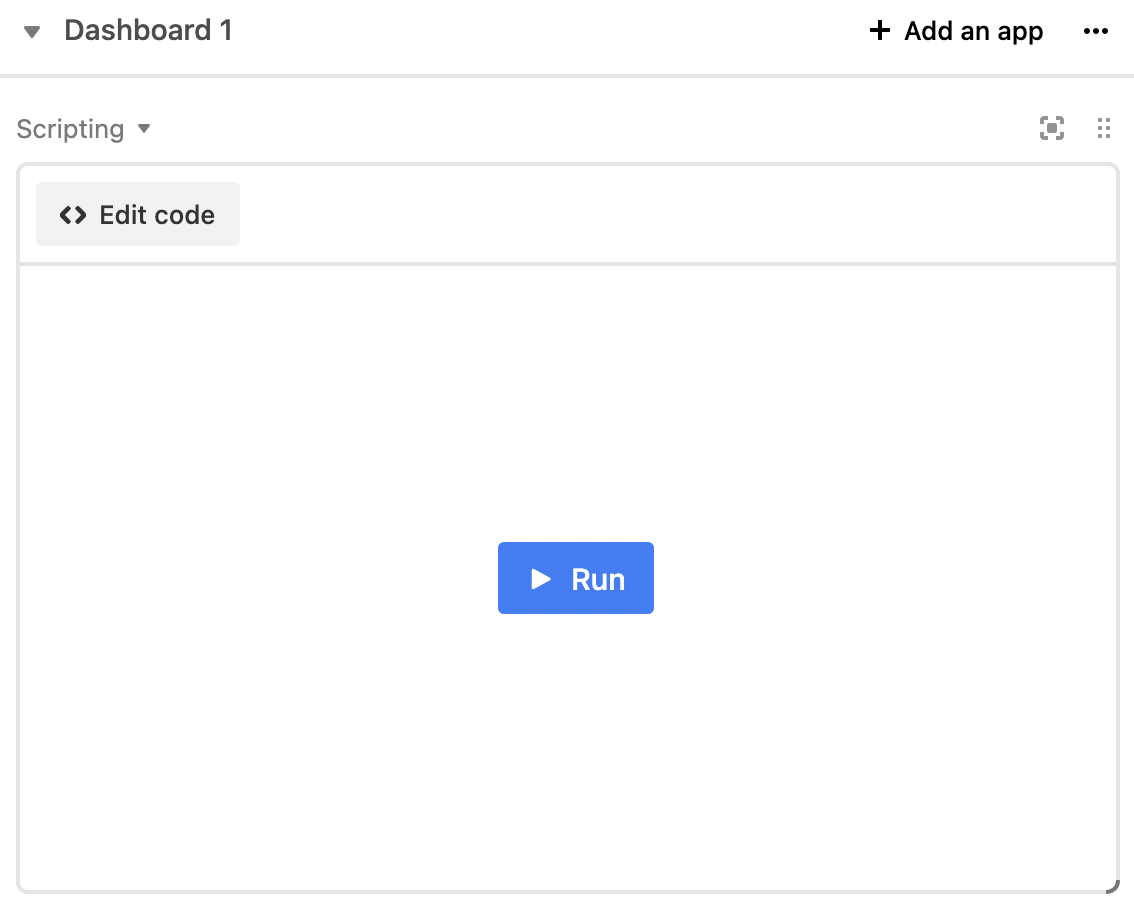
Click the Edit code button.
Copy and paste the script code below into the code editor in Airtable:
let table = base.getTable(cursor.activeTableId)
let record = await input.recordAsync('Pick a record', table)

const { fields } = table;

const sizes = record?.getCellValueAsString("size");
const template = record?.getCellValueAsString("template");
const API_KEY = record?.getCellValueAsString("API Key");

var request = {
  template,
  "sizes": [],
  "elements": {
  }
};

if (sizes) {
    const sizesParts = sizes.split(",").map((part) => part.trim());

    sizesParts.forEach((size) => {
        const sizeParts = size.split("x").map((part) => part.trim());
        request.sizes.push({
            "width": parseInt(sizeParts[0]),
            "height": parseInt(sizeParts[1])
        });
    });
}


fields.forEach((field) => {
  if (field.name.includes(":")) {
    // split and add to the elements object
    const parts = field.name.split(":");
    const name = parts[0];
    const property = parts[1];

    if (!request.elements[name]) {
      request.elements[name] = {};
    }

    request.elements[name][property] = record?.getCellValueAsString(field.name)
  }
})

let response = await fetch('https://api.canvas.switchboard.ai', {
  method: 'POST',
  body: JSON.stringify(request),
  headers: {
    'Content-Type': 'application/json',
    'X-API-Key': API_KEY
  }
})

try {
  let asJson = await response.json()

  if (record && asJson?.success) {
        await table.updateRecordAsync(record.id, {
        image: asJson.sizes.map((result) => {
            return { url: result.url };
        })
    });
  } else {
    console.log(asJson);
  }
} catch(err) {
  console.warn("Something went wrong");
  console.error(err);
}
Close the script editing window and the Apps sidebar so that you can see your table again.
Now we can test our table and the script we’ve just added.
Enter a quote, a hashtag, specify the template name (quote-image) and a size. Finally, click Create.

The Apps side bar will open again on the right as the script runs. If there are any problems with the script a message will appear in the Apps side bar, but if successful, you’ll see a thumbnail of the generated image in the image field:

Double-click the image to see a full-screen preview: 
If you’re on the Agency or Enterprise plans, you can create more than one size of image per API request. This means you can specify up to five sizes in the size field, and Canvas will create an image for each size, bringing them back to your table’s image field.
This tutorial shows how you can add a script to Airtable that calls Switchboard Canvas to help with quote generation. You can target any element’s property by naming your table’s fields in the form of element:property.
Find out more about what properties you can target here: https://developers.switchboard.ai/docs/sb-canvas/docs/Property-Reference.md
You can try Switchboard Canvas free for 14-days with no credit-card required. Sign up today or find out more information at https://www.switchboard.ai


We care about the protection of your data.